| 俽倎値倱倳倝丂俙倀亅俢俇侽俈丂媽僞僀僾丂廋棟婰榐丂 |
| 丂暯惉侾係擭俇寧侾係擔摓拝丂丂丂俉寧係擔姰椆 |
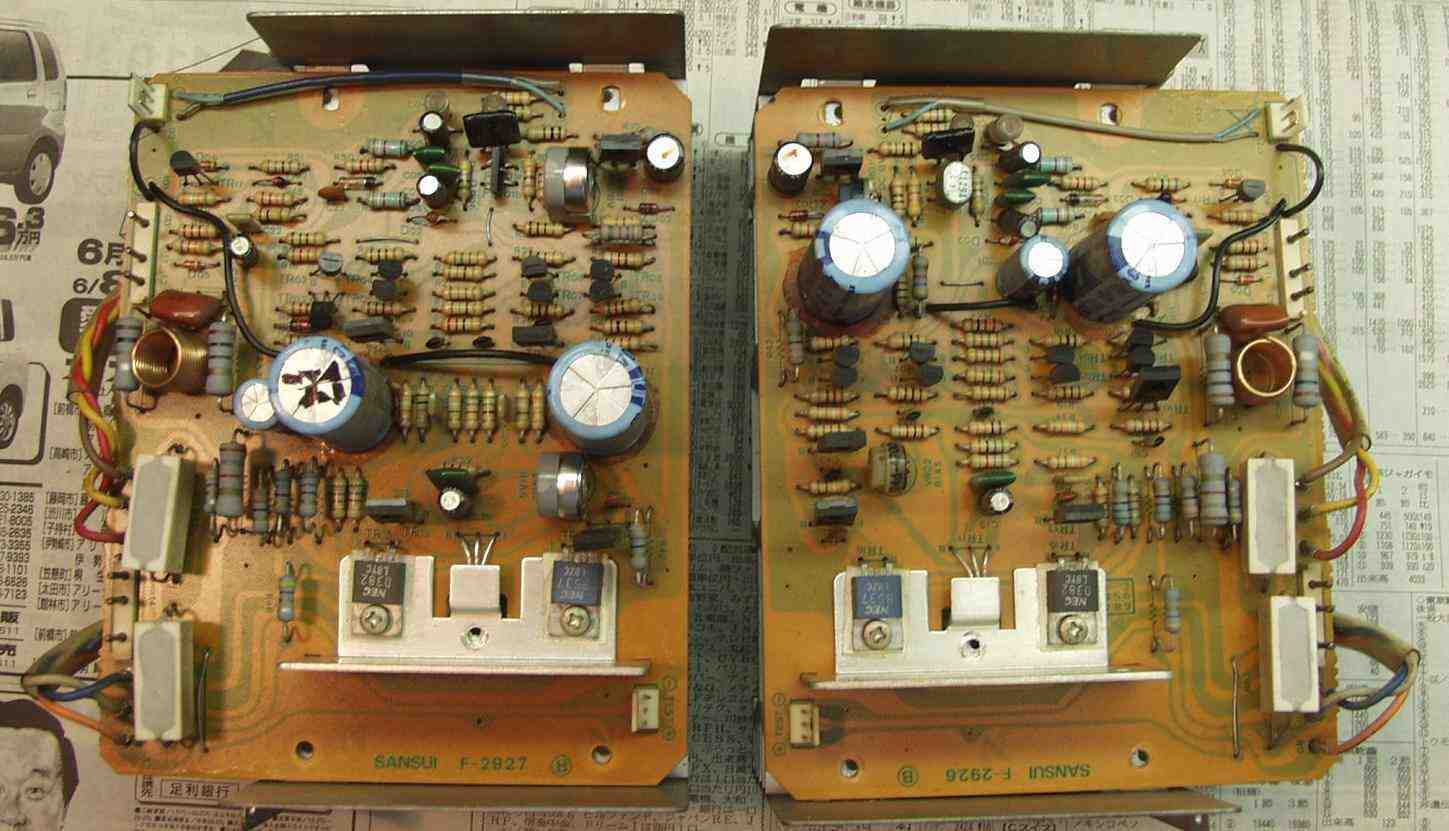
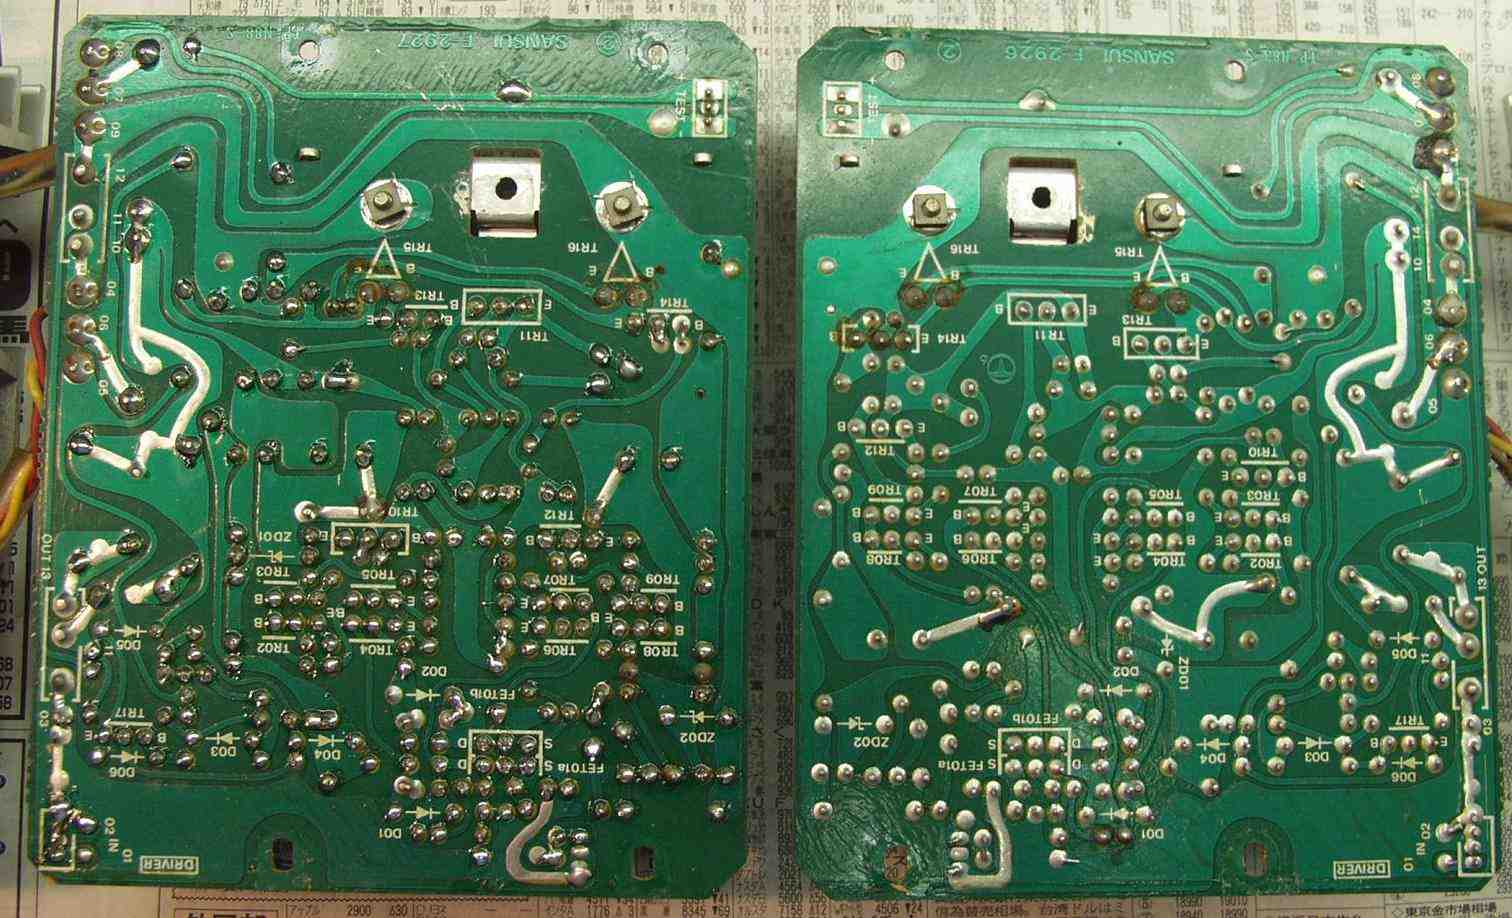
| 悺昡丂俽俹弌椡抂巕偑乽嫴傒崬傓僞僀僾乿偺媽僞僀僾偼恖婥偑偁傞傛偆偱偡偑丄 丂丂丂丂彫惗偑尒傞尷傝丄僐儞僨儞僒乕偺惢憿儊乕僇乕偑堎側傞偩偗偱偡丄 丂丂丂丂夞楬丒巊梡晹昳偼慡偔摨偠偱偡 |
| A丏丂廋棟慜偺忬嫷 丂丂僆乕僶乕儂乕儖廋棟埶棅丅 B丏尨場 丂丂奺晹楎壔偺暅尦 俠丏丂廋棟忬嫷 丂丂俽俹愙懕儕儗乕岎姺 丂丂儊僀儞俙俵俹僶僀傾僗乛僶儔儞僗敿屌掕倁俼岎姺 丂丂儊僀儞AMP弶抜俥俤俿乮揹奅岠壥僩儔儞僕僗僞乕乯岎姺 丂丂僐儞僩儘乕儖AMP弶抜俥俤俿乮揹奅岠壥僩儔儞僕僗僞乕乯岎姺 丂丂攝慄庤捈偟丄曗嫮 俢丏巊梡晹昳 丂丂俽俹愙懕儕儗乕丂丂丂丂丂丂丂丂丂丂丂丂丂丂丂丂丂侾屄 丂丂敿屌掕倁俼丂丂丂丂丂丂丂丂丂丂丂丂丂丂丂丂丂丂丂丂俇屄 丂丂儊僀儞AMP弶抜俥俤俿乮揹奅岠壥僩儔儞僕僗僞乕乯丂丂丂丂丂丂丂丂丂丂丂丂丂丂俀屄 丂丂僐儞僩儘乕儖AMP弶抜俥俤俿乮揹奅岠壥僩儔儞僕僗僞乕乯丂丂丂丂丂丂丂丂丂丂俀屄 丂丂僩乕儞僐儞僩儘乕儖倁俼丂丂丂丂丂丂丂丂丂丂丂丂丂侾屄 俤丏丂廋棟旓丂俀俈丆侽侽侽墌丂丂丂丂亙亙捠忢廋棟亜亜 |
| 侾丏俽俹愙懕儕儗乕岎姺 |
 |
| 俀丏廔抜僪儔僀僽婎斦丄嵍亖廋棟屻丄塃亖廋棟慜 |
 |
| 俁丏廔抜僪儔僀僽婎斦敿揷曗惓丄嵍亖廋棟屻丄塃亖廋棟慜 |
 |
| 係丏僩乕儞丒僐儞僩儘乕儖偺掅壒倁俼廋棟 |
 |
| 俆丏嫮椡側愙揰暅妶嵽傪巊梡偟偨堊丄掞峈懳偑攋懝丄廋棟晄壜側偺偱岎姺偡傞 |
 |
| 俇丏僈儔僗僋儕乕僫乕偱僷僱儖偺愻忩 |
 |
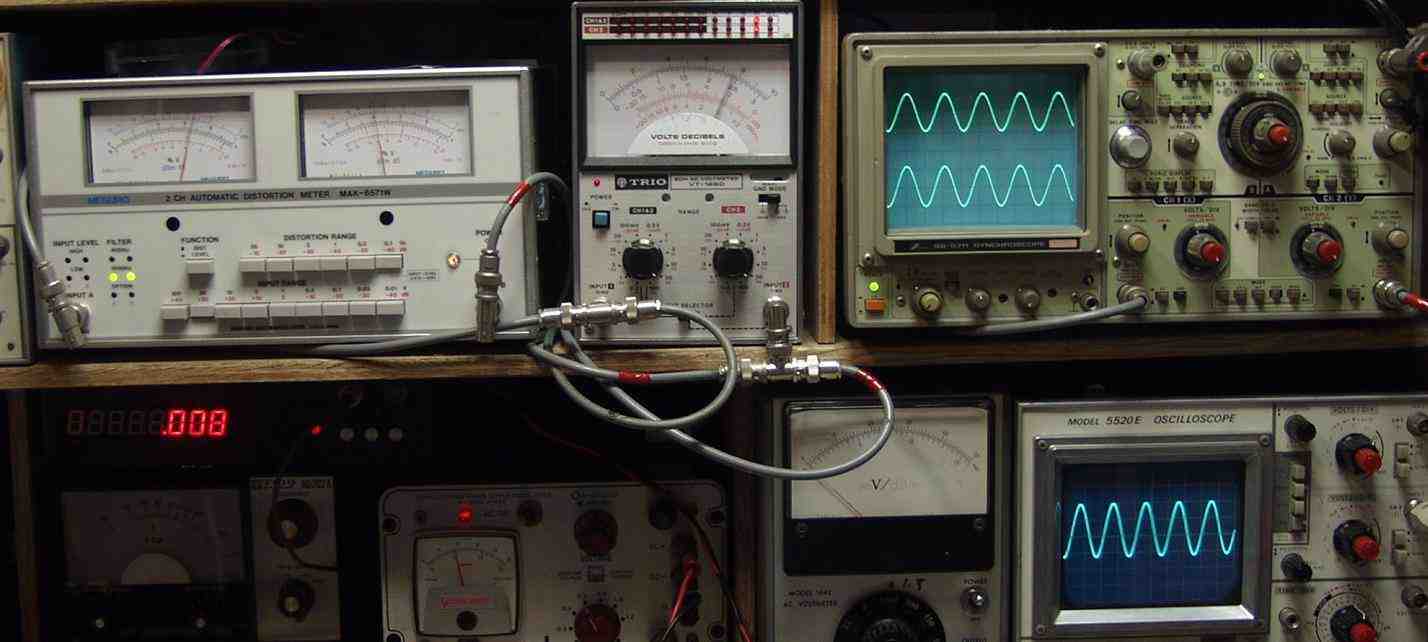
| 俈丏弌椡乛榗傒棪應掕丒挷惍丂丂弌椡亖俀係倁亖俈俀倂丂榗傒棪侽丏侾亾丂倎倲亖侾侽侽侽俫倅丂俙倀倃抂巕擖椡 |
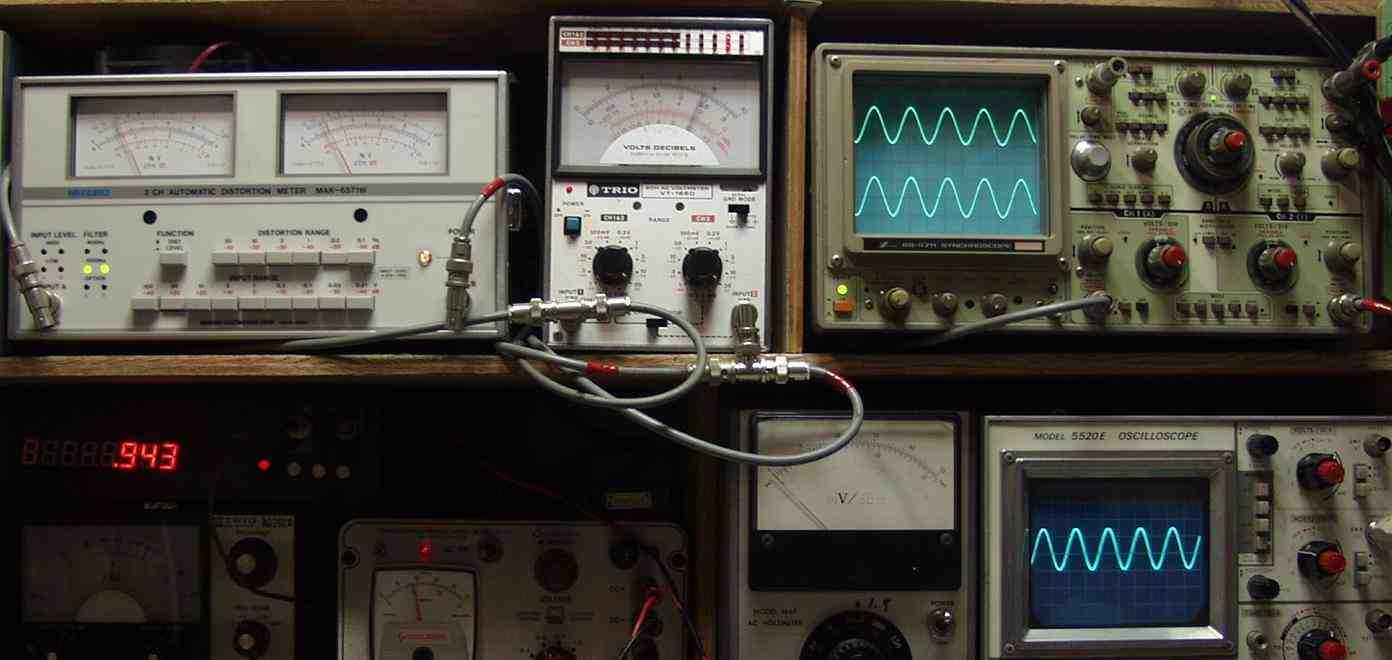 |
| 俉丏弌椡乛榗傒棪應掕丒挷惍丂丂弌椡亖俀係倁亖俈俀倂丂榗傒棪侽丏侾亾丂倎倲亖係侽侽俫倅丂俙倀倃抂巕擖椡 |
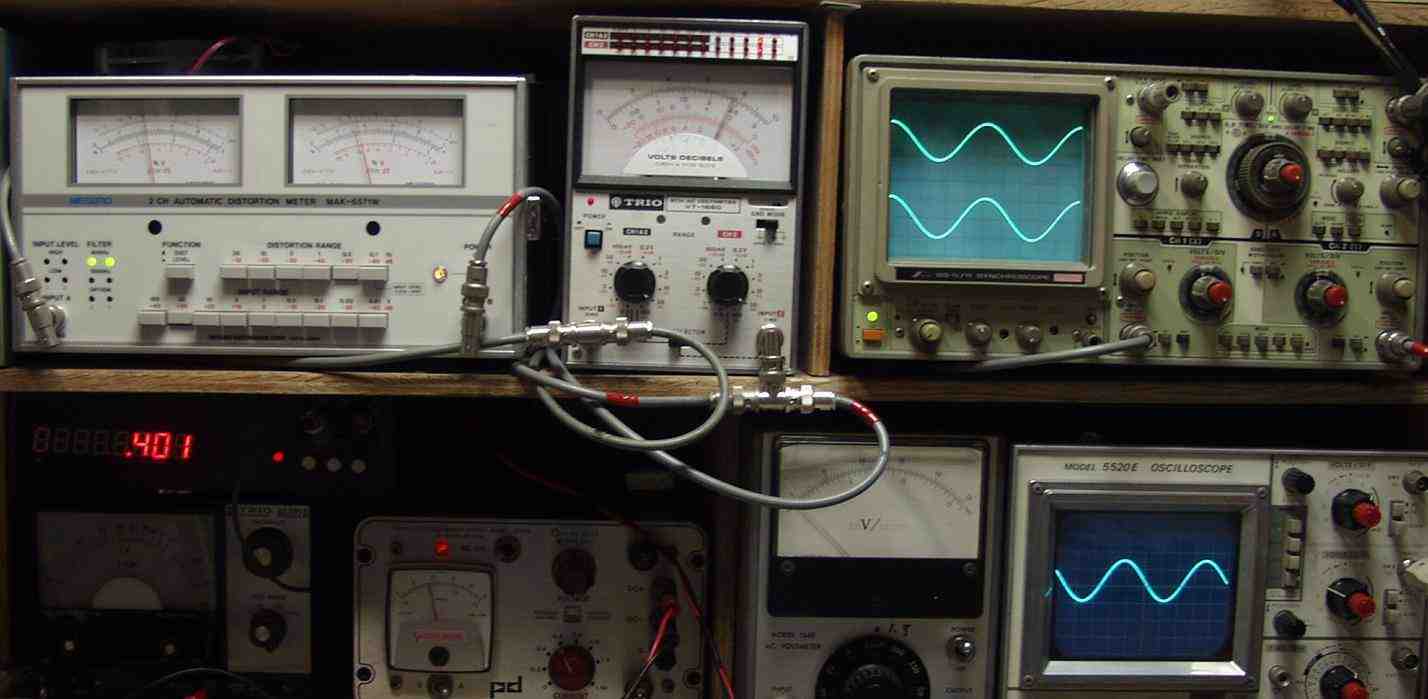 |
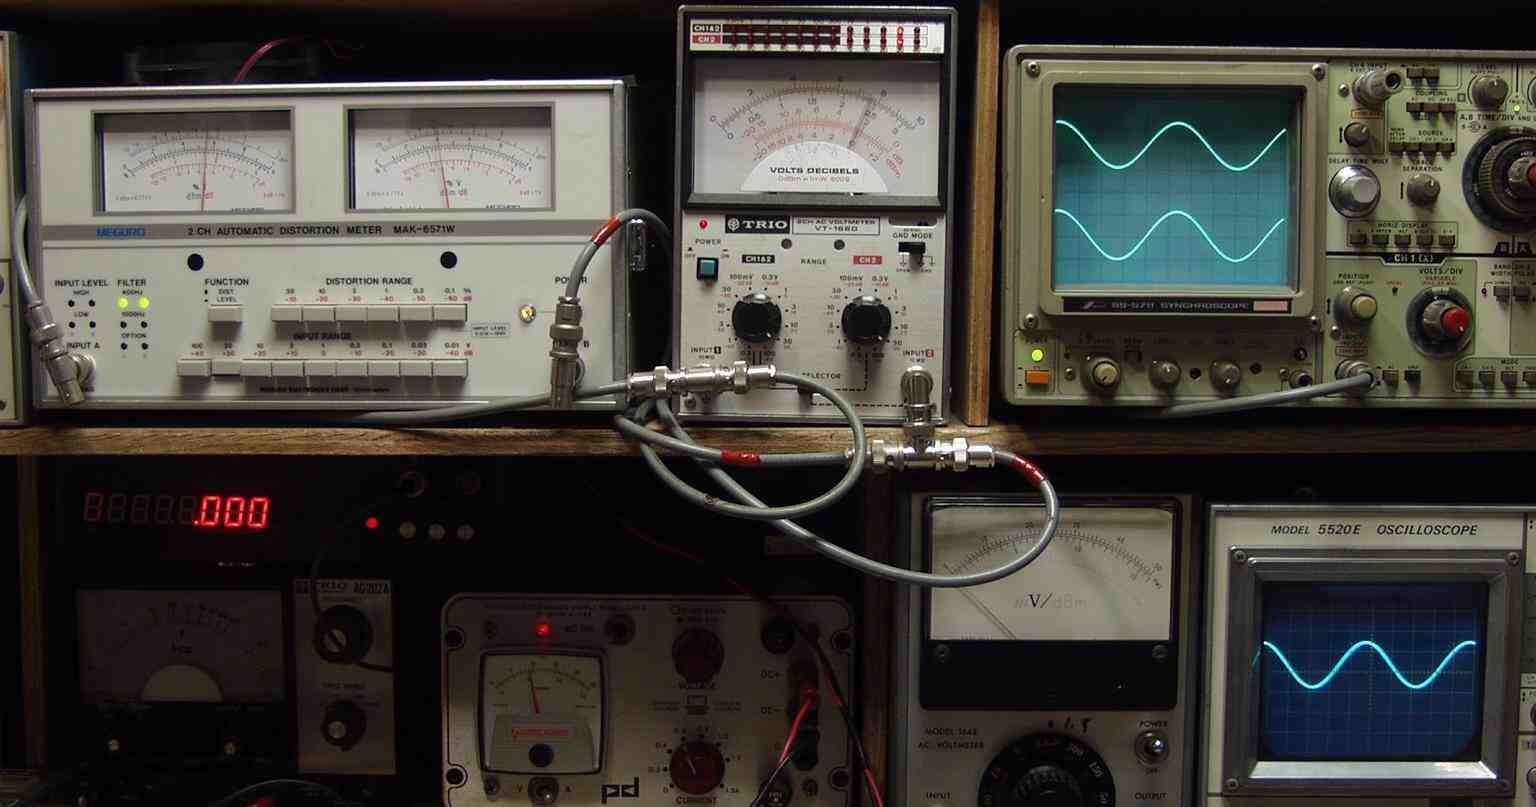
| 俋丏弌椡乛榗傒棪應掕丒挷惍丂丂弌椡亖俀係倁亖俈俀倂丂榗傒棪侽丏侽俇亾丂倎倲亖侾侽侽侽俫倅丂俵俵抂巕擖椡 |
 |
| 侾侽丏弌椡乛榗傒棪應掕丒挷惍丂丂弌椡亖俀係倁亖俈俀倂丂榗傒棪侽丏侽俆亾丂倎倲亖係侽侽俫倅丂俵俵抂巕擖椡 |
 |
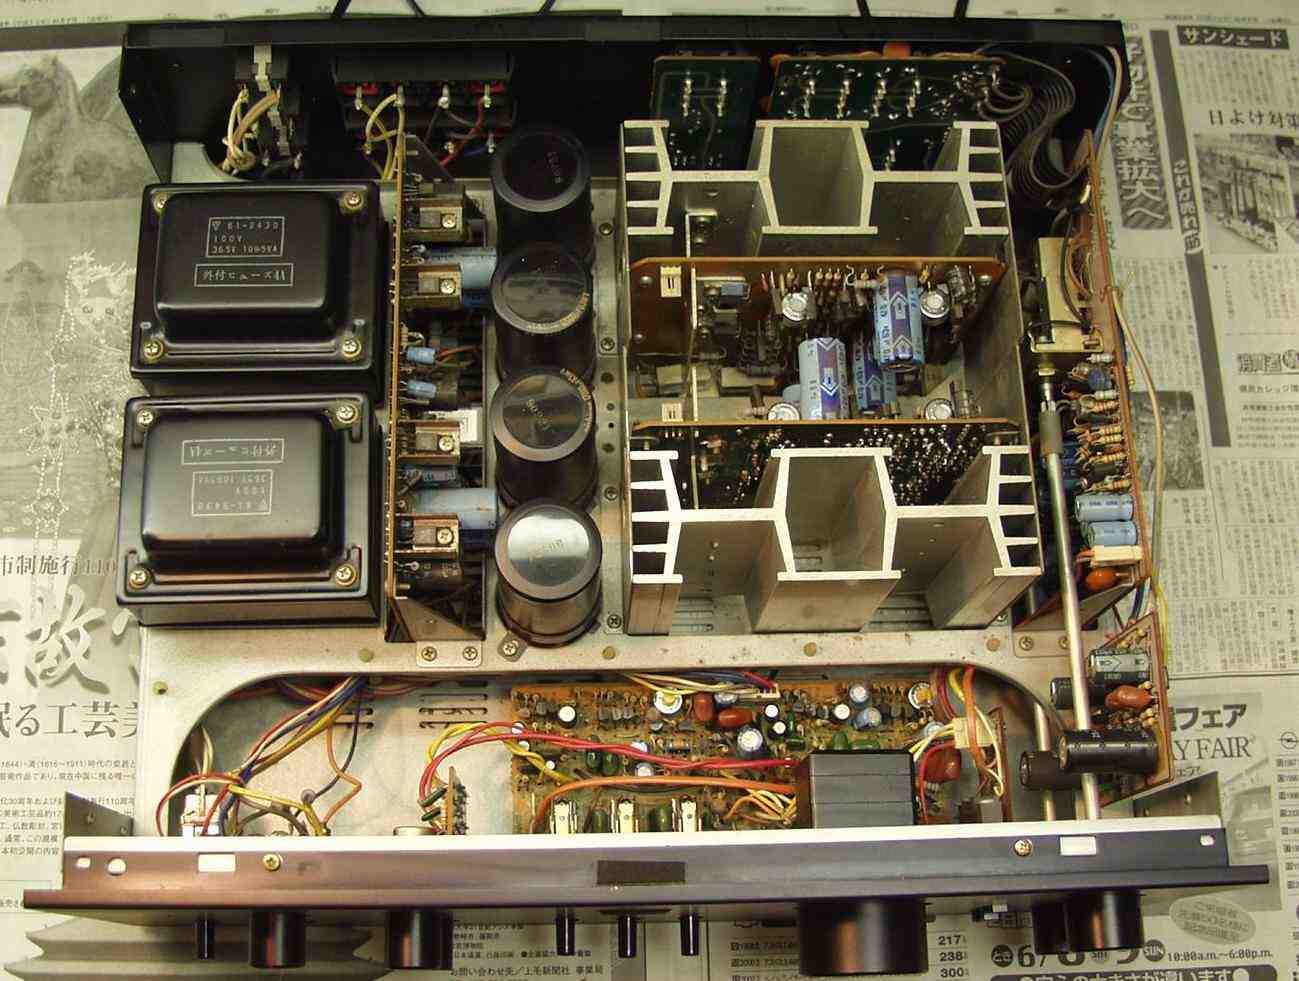
| 侾侾丏姰惉丂忋偐傜尒傞 |
 |
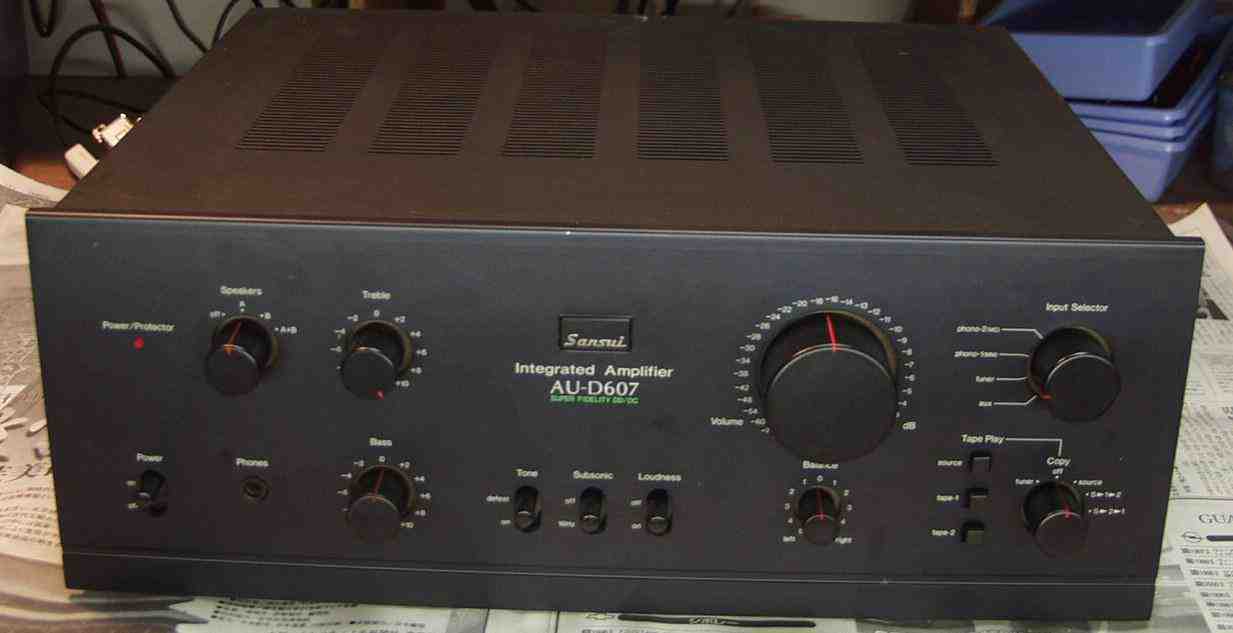
| 侾俀丏姰惉丂壓偐傜尒傞 |
 |
| 侾俁丏丂俀係帪娫僄乕僕儞僌丅 |
 |
| 丂丂丂 |
| 偙偙偵宖嵹偝傟偨幨恀偼丄廋棟埶棅幰偺婡婍傪嶣塭偟偨幰偱偡丄偦偺徰憸尃丒斉尃丒挊嶌尃摍偼丄曻婞偟偰偍傝傑偣傫丅 丂幨恀丒婰帠傪柍抐偱彜梡棙梡丒揮嵹摍偡傞偙偲傪丄嬛偠傑偡丅 丂Copyright(C) 2021丂Amp Repair Studio All right reserved. |